Lesson 3.2: Creating Components and Managing State in React
Introduction
This lesson contains the following activities that you should complete as you go through it:
- 3.2.1
- 3.2.2
Welcome to the second lesson of the React.js module. During this lesson we are going to cover components and how to manage state in React.
You by now will be familiar with what a web component is. We will create a component and make an API call to retrieve data from it and then we are going to use that data to populate our website.
Inside the smart component which we are going to create below, you will learn how to manage state inside a react application.
Setting up the Single Page Application
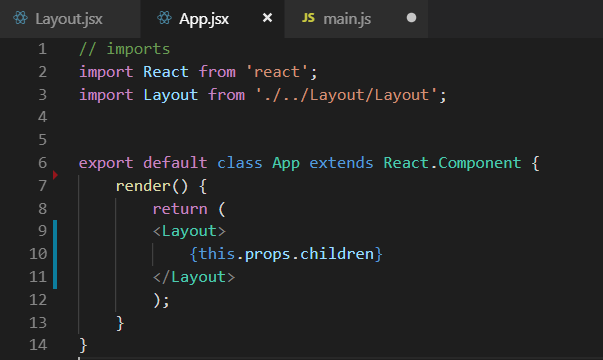
In this section we are going to update our, layout.js file to cater for a single page application.
this.props.children, lets the application know which components to swap when we request a new page
Configuring Routes
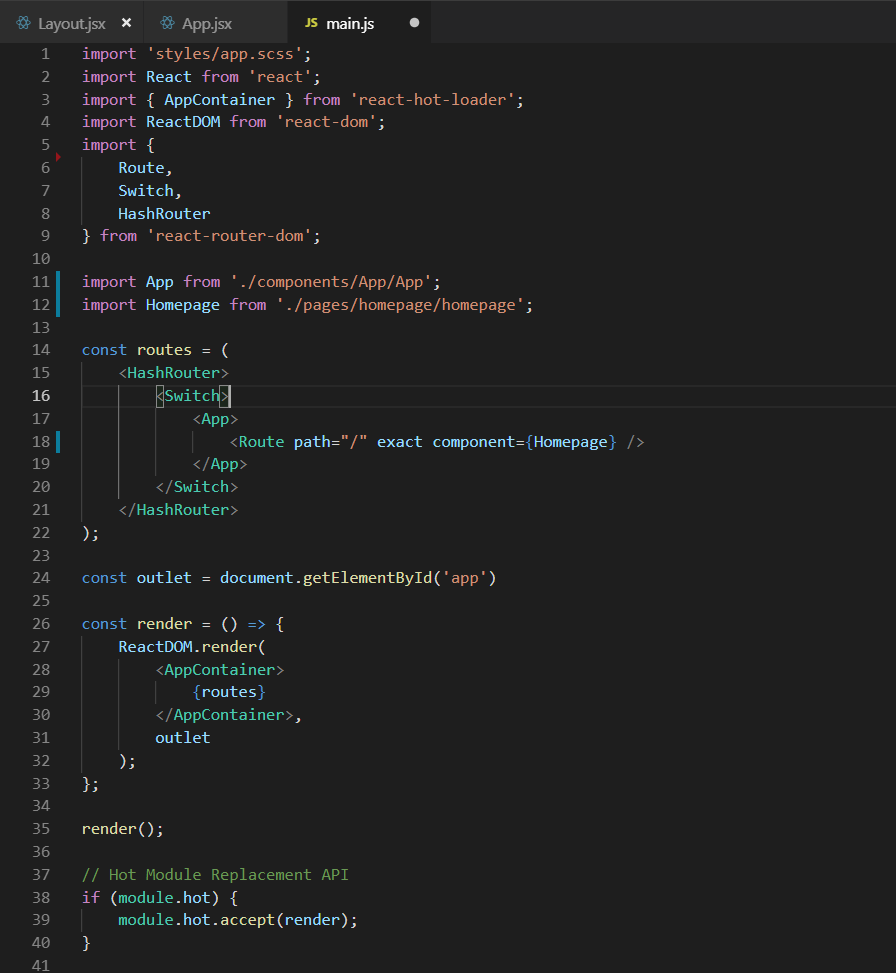
On line 12 we inport our homepage.jsx file(Smart Component)
We then add it to a route on line 18 so that our application knows what component to load for which path.
State Management
State Management is an important part of React.js. If data might change it is a great idea to use state, as state is easily updated inside the application. Generally, when making an API call, it is a good idea to use state as you will not know when data will be changed.
Remember that state objects are always initialized inside the constructor.
Creating a Smart Component
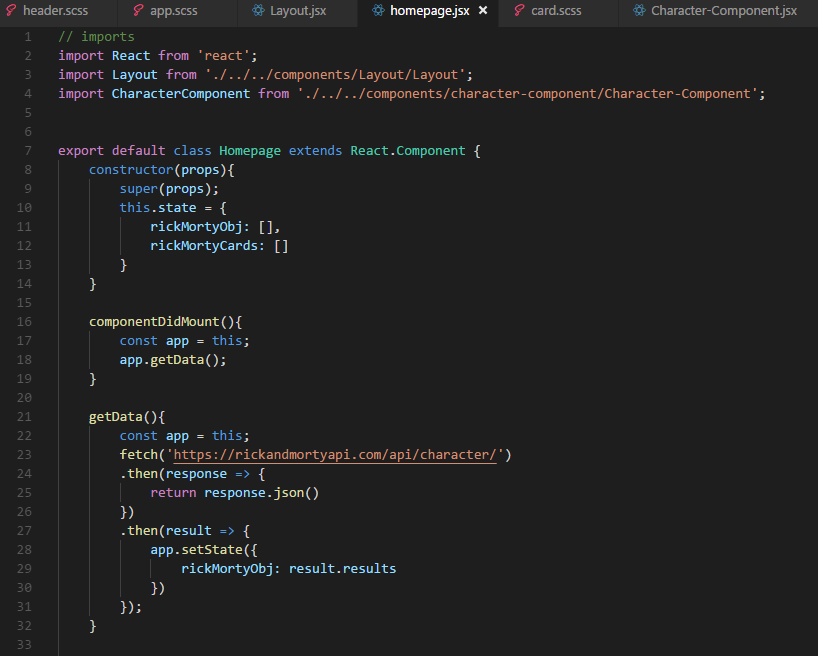
- We are going to create a new folder in the root of the source folder. This folder will be called “pages”. This folder will house all our smart components. If we remember correctly, a smart component makes API calls and populates dumb components. Inside this folder please create a file called homepage.jsx.
- After we create a class we create a constructor. A constructor is the entry point of any class. This code will be run first. Please create a constructor as depicted above inside your class braces.
- The constructor takes in one argument which is props. This will hold the value of all props coming into the application.
- The super keyword allows us to make calls on a parent objects functions. The super function always must be called before you reference the “this” keyword.
- The next section that we set up is the state section. State is at the heart of all components. We use state to render and update components as you will see later.
- Inside the state object we create two keys which will hold values. We assign each of them a blank array.
- The next method we call is the componentDidMount method. We will learn about react lifecycles later in this course. For now, all we need to understand is that the componentDidMount method will execute directly after the component has rendered in the DOM.
- Because the keyword “this” has a different scope through different parts of the application, we declare it in function scope and assign to a constant called app.
- Directly after that we call a function called getData which is going to make the API call for us.
- Inside the getData method we declare a constant “app” which is assigned to “this”. We then use a fetch statement to make the API call. Thereafter we convert the response to a JSON object.
- Inside the final then statement we assign the result to the variable which we created on line 11 called “rickMortyObj”. This is a state variable.
- We will use this state variable to populate the cards which we are going to create.
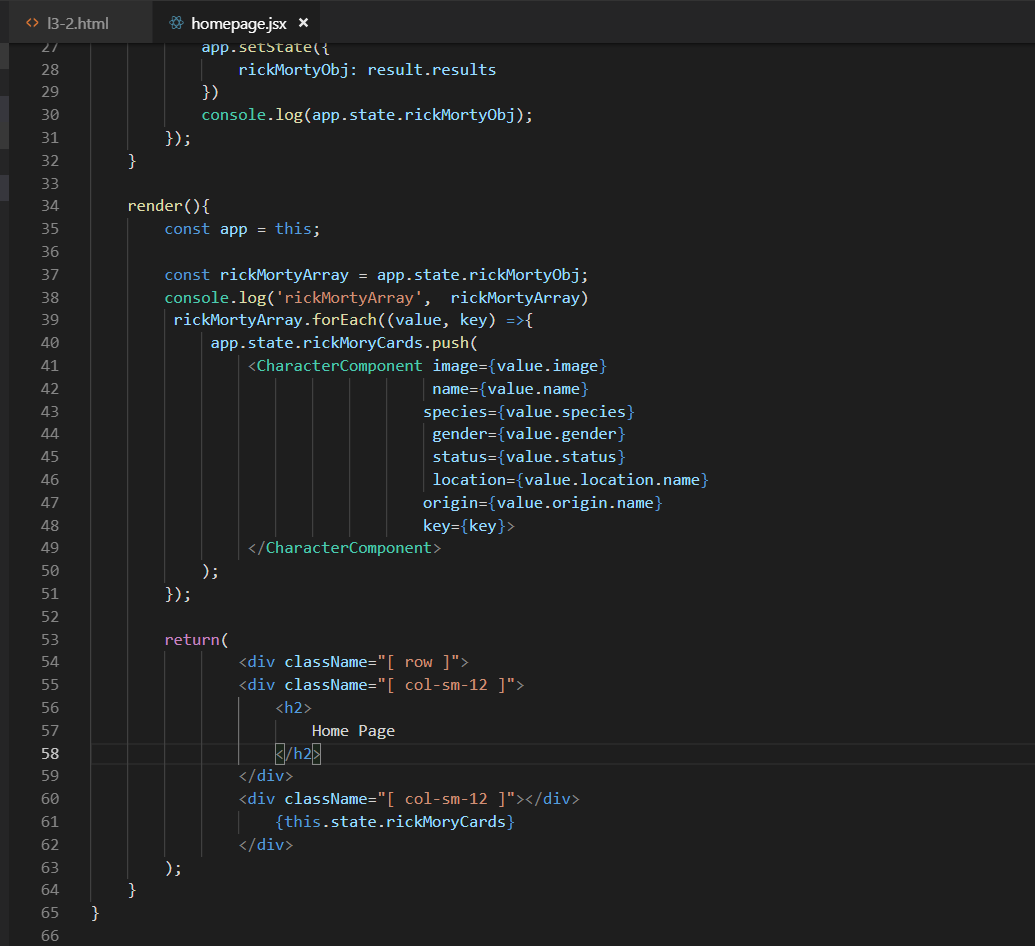
- Inside the same homepage.jsx file we are going to create the render method for our application.
- The first variable which we set up is the variable which stores the value of “this” as we want the scope of this to be in the scope of the render function.
- The second variable we create is an array. We assign it a value of the rickMortyObj, which we retrieve from state.
- On lines 37 to 50 we set up a forEach loop on the rickMortyArray. This loop takes in a function as an argument.
- The arguments for these functions will be a value which will be the value retrieved from the array and the second will be a key. This will hold the iteration of which loop is on.
- Inside the for loop we push the CharacterComponent cards to an array create which is a state variable called rickMortyCards. We will display this array later.
- Because we referenced the CharacterComponent on line 4 we can now make use of it inside our HTML.
- If you notice all the values are passed to the Component line up to what we have returned from the API. In this type of loop, we needn’t reference the number of iteration.
- All the values will be sent to the components - we can refer to this as props which is short hand for properties.
- There is only one prop which doesn’t line up with what is in the API. This is the key prop. This prop will just give our component a unique identifier.
- Inside the return statement of the render method we create a few divs with bootstrap classes. These will enable us to use the grid system from bootstrap.
- On line 61 we call the state variable “rickMortyCards” which now should have all the CharacterComponents inside it and this will render in our HTML.
- If you install all the chrome react plugins from Lesson 3.1's video and view the DOM via the react tools, you should be able to see the unique key on each component. You will however only be able to do this after you create the dumb component.
We should now be all set up to carry on with our dumb component. I am just going to recap on a dumb component. These components are only passed information to display. Please don’t perform any calculations inside them.
In most cases you will only need a render method inside a dumb component. However, if there is no solution but to have a method inside the dumb component then you may do this;this will however be a very fringe case.
Character-Component.jsx
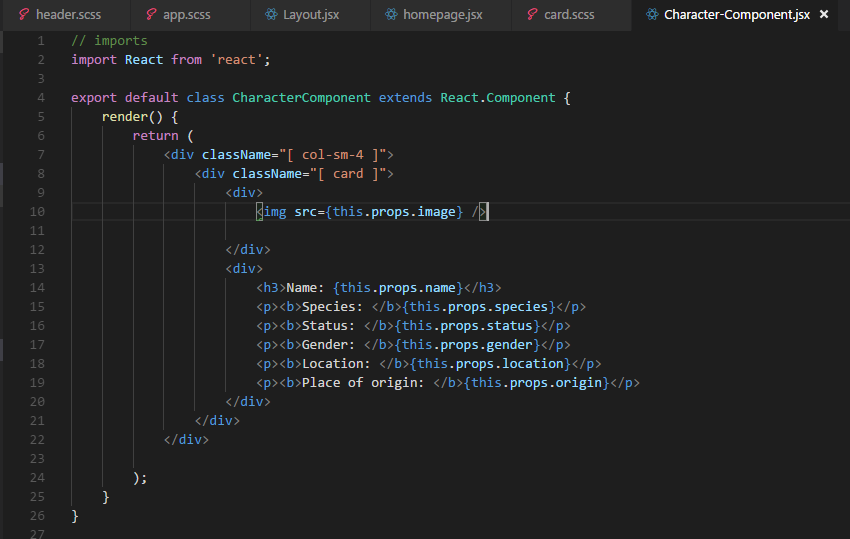
- Inside the components folder please create a new folder and call it Character-Component, just as you did with the Layout component.
- You may then create a file called Character-Component.jsx.
- This file is simple, everything which we passed into this component from the Smart Component can be displayed simply by wrapping them inside two curl braces (interpolation).
- There will always be this.props in front of the prop name. This is because we are referencing the props from the property object which was passed in.
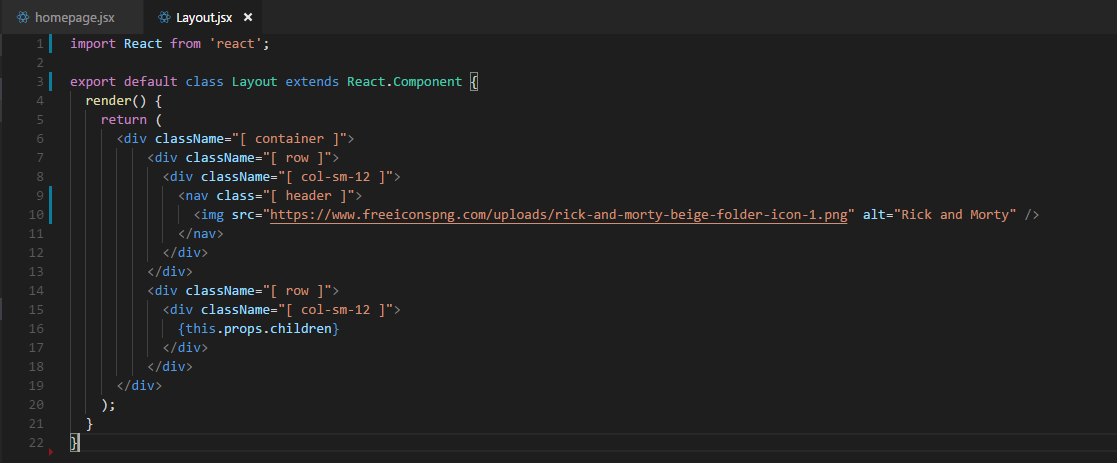
Layout.jsx
We are going to make our layout look like a website by adding a logo to it. The logo may be retrieved from the following URL: https://www.freeiconspng.com/uploads/rick-and-morty-beige-folder-icon-1.png
The layout.jsx file has changed slightly we will add an image in on line 10.
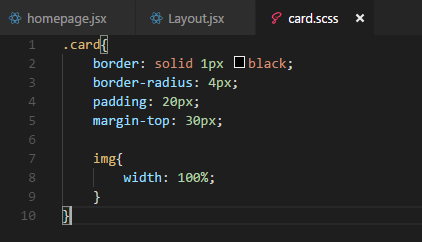
card.scss file
Inside the partials folder in your styles folder create a new scss file called card.scss and import it into your app.scss file.
Please write the following code inside the card.scss file. This will be to style our cards for each of the characters:
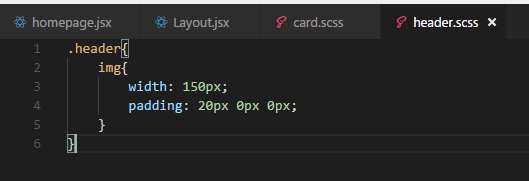
header.scss
Create a header.scss file inside the partials folder just as you did previously and link it to the app.scss file. Inside the header.scss file please place the following code:
If you now run an “npm start” while cd’ed inside your project folder, your website should open up with the following result:

Activities
Activity 3.2.1: Watch (1.5 hours)
Please watch all the videos underneath the following sections
- React Components
- Props and State
- Additional Library Features
- Conclusion
Activity 3.2.2: Read (4 hours)
The links below will give you a better understanding on Components and State Management.
© Noroff